RV Pass-Through Storage Ideas Based on Access and Fit
Organize RV pass-through storage by opening size, reach, and the equipment you unload first. Measure compartments and check loading limits before choosing bins.
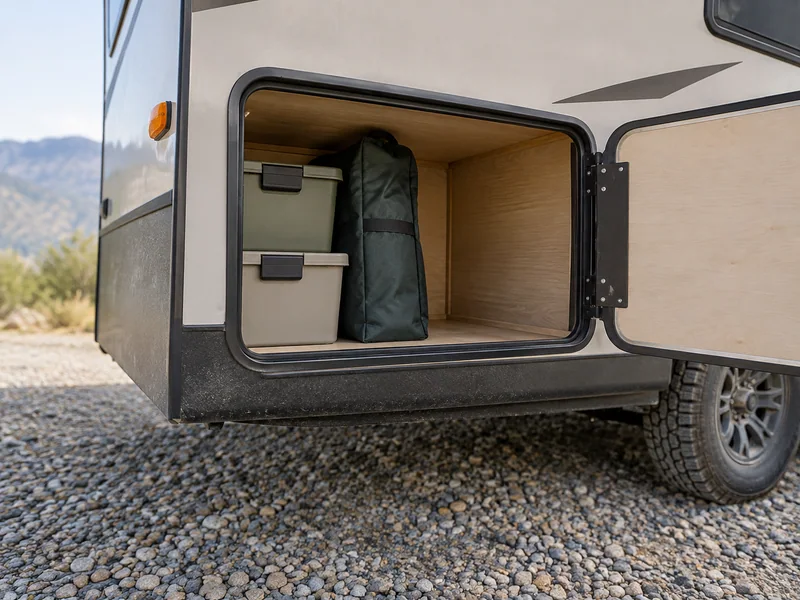
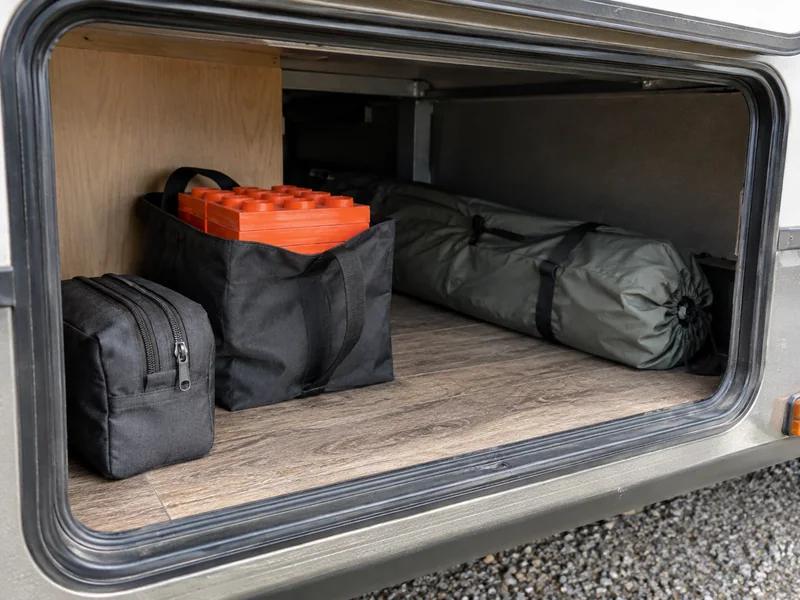
AI-generated illustration: Small equipment groups in an exterior bay illustrate accessible packing without establishing a compartment rating or installed layout.
Pack exterior RV storage around the sequence of arrival and departure. Measure both doors separately, keep essential setup equipment reachable, and plan where wet or dirty gear returns. Compare removable bins and fitted trays using their complete movement and installation requirements, while checking vehicle and compartment limits independently.
A pass-through compartment earns its keep when the first thing you need is the first thing you can reach. It becomes frustrating when a leveling item sits behind chairs, the clean-water hose is underneath dirty equipment, or a long box can only be removed from the side facing a hedge.
Start with arrival and departure tasks. Give each piece of equipment a use order, a retrieval side, and a return condition. Then check the openings, the space inside and the ground where you will stand. Containers come after those decisions.
This guide covers exterior baggage compartments accessed through side doors. Interior bed-base access has its own under-bed storage worksheet. The examples here are researched planning comparisons, not measured RV installations or a universal loading diagram.
Map each door separately
Two doors leading into one cavity do not necessarily offer equal access. A door can be narrower, sit above a different threshold, or have a fixture immediately behind it. Slide-outs, stabilizers, utility connections and campsite obstacles may also affect where you can stand.
Make a simple top-view sketch and label the two sides consistently. Use terms such as curbside and roadside only if you have clearly identified them on your own vehicle. Mark the door hinges, locks, seals, lights, service panels and equipment that occupy the compartment.
Record the route when the RV is in its relevant parked configuration. Do not operate slides or other mechanisms solely to test a storage idea without following their instructions and checking the surrounding area. If equipment cannot be reached in the configuration needed for arrival, change its storage location.
| Measurement | Door A | Door B | Why it matters |
|---|---|---|---|
| Narrowest clear width | ________ | ________ | Handles and tray rails must pass through |
| Clear opening height | ________ | ________ | A filled container can be taller than its empty shell |
| Threshold or lip | ________ | ________ | Contents may need lifting before removal |
| Usable reach before an obstruction | ________ | ________ | Frequent equipment needs an accessible position |
| Door movement and support | ________ | ________ | Retrieval must not interfere with the door |
| Clear standing and unloading space | ________ | ________ | A tray or long item needs room outside |
| Access in the required parked configuration | ________ | ________ | Setup gear must be available when needed |
Measure the cavity separately, including any change in height or width toward the center. Do not calculate usable capacity from the two outside doors alone. Leave service and movement areas marked as unavailable until the manufacturer’s guidance confirms their permitted use.
Pack for arrival before packing for leisure
Write your actual setup procedure from the RV manual, then identify which stored items it requires. The storage sequence should support that procedure. It should not invent a new order for leveling, stabilizing, hitching or utility connection.
Put the first required equipment within reach without unloading the leisure supplies. Keep the next task’s equipment together, while preserving the loading distribution required for the RV. If those two priorities conflict, weight and equipment requirements govern; accessibility can be improved with smaller groups or a different approved location.
| Equipment group | Access goal | Return condition to plan for | Storage question |
|---|---|---|---|
| Arrival equipment specified by your setup procedure | Reach before unloading the rest | Possibly dusty or damp | Can it be removed with the needed doors accessible? |
| Clean-water connection equipment | Keep identifiable and protected | Drain and store according to its instructions | Is it separate from waste-handling equipment? |
| Electrical hookup equipment | Reach when the setup procedure calls for it | Inspect and handle as its instructions require | Can the cable be removed without pulling on nearby components? |
| Waste-handling equipment | Distinct, appropriate storage | Used equipment requiring its own handling | Is its container and location separate from clean supplies? |
| Chairs, table and outdoor mat | Retrieve after the site is ready | Dirt, dew or rain may change packing | Where can they be cleaned or dried before final storage? |
| Camp kitchen equipment | Unload in useful task groups | Clean dry tools, food and waste have different needs | Does the box match the actual menu and wildlife rules? |
| Occasional spares | Find when needed without using service spaces | Usually dry, but check condition | Is the label visible and its location recorded? |
One large setup bin can be less convenient than a small first-access kit. Check the filled weight and the opening before deciding. Do not make a box so comprehensive that moving it requires unloading it into the campsite.
The camp kitchen setup guide can help reduce equipment that your menu does not require. Removing an unnecessary cooking appliance improves the packing problem more directly than building another shelf for it.
Compare loose bins, long bags and fitted trays
Choose a removable container when the contents need to travel from the bay to a table or utility location. Choose an existing fitted drawer or approved tray when it makes an otherwise difficult retrieval manageable. A sliding tray adds its own installation, weight and clearance requirements.
Test rigid containers with lids closed and handles in their carrying position. For long bags, include the actual poles, chair frames or tools inside them. A bag can fit lengthwise and still fail the turning movement outside the hatch.
| Option | Useful feature | Tradeoff | Check before adoption |
|---|---|---|---|
| Several small removable bins | Take one task’s equipment to the work area | More lids and containers to identify | Filled weight, door clearance and travel retention |
| Long fitted equipment bag | Keeps a chair or pole set together | May need a long straight removal path | Packed length and ability to turn outside the door |
| Shallow open tray within existing storage | Small items remain visible | Loose contents still need retention | Existing compartment instructions and item movement |
| Installed sliding cargo tray | Brings deeper items toward the opening | Reduces clear height and adds weight and hardware | Correct model, installation, extension and loading guidance |
| A single large tote | One place for a related equipment group | Can become heavy or bury the first-needed item | Can you lift it and reach its contents when full? |
For a concrete product distinction, MORryde’s 60% extension cargo trays do not all slide out from both sides: the manufacturer identifies that feature for its 90-inch versions. Its page also says these trays lock in the stored position. Those details matter when comparing a product with a two-door compartment. They do not establish that the product fits your RV or can be secured to its floor.
The tray’s own advertised capacity is not permission to put that load in the vehicle. The compartment, mount, surrounding structure, vehicle loading and axle limits must all support the intended installation and cargo.
Read installation requirements before treating a tray as a purchase
The MORryde cargo-tray installation manual checks baggage-door movement and clearance around the opening. It also directs the installer to verify that plumbing and wiring are not beneath the mounting location and recommends contacting the manufacturer for those details. Its generic hardware pack does not remove the need to select hardware appropriate to the application.
These are purchase-screening questions, not a tray-installation tutorial. If you cannot identify what lies beneath the compartment, record that as an unresolved installation item. Do not drill exploratory holes or assume that another owner’s fasteners suit your vehicle.
Ask for the complete installed dimensions, the tray’s own weight, its allowed extension, latch behavior and maintenance requirements. Include any riser or support arrangement in the calculation. A tray that clears a raised door lip may bring the cargo too close to the compartment ceiling.
Keep enough exterior space for the movement specified by the product. Do not use an unsecured tray as a test platform or extend an uninstalled assembly beyond its manual’s instructions.
Keep vehicle loading visible in the plan
List the empty organizer weight and the packed contents separately. Record the source and date for compartment ratings and the vehicle’s loading labels. If there is no verified rating for a proposed attachment or shelf, do not substitute the carrying handle’s rating or the total RV cargo allowance.
The Winnebago Towables 2025 manual distinguishes vehicle and axle ratings and discusses distributing cargo rather than overloading one side. Use your own manufacturer’s instructions and appropriate loaded-vehicle weighing to verify the actual arrangement. This guide supplies no universal front-to-back allocation or tongue-weight calculation.
Secure contents for travel using suitable existing provisions and the relevant instructions. NHTSA’s load-securement guidance emphasizes securing cargo and checking it before driving. A closed baggage door should not be treated as the only plan for every loose item behind it.
Give wet and dirty equipment a return route
Arrival is usually a dry packing exercise at home. Departure may involve a muddy mat, damp chair fabric or a cable lying on wet ground. Plan how you will inspect, clean, drain or dry each item according to its instructions before long-term storage.
A temporary separation bag can keep dirt away from clean equipment during the journey to an appropriate cleaning place. It does not make damp fabric ready for storage. Mark the item for reopening and drying so it does not vanish inside an opaque box until the next trip.
Preserve distinct storage for potable-water and waste-handling equipment. Keep cleaning chemicals in suitable labeled containers and in locations permitted by their labels and RV guidance. Do not place fuels or other restricted materials in a general cargo bay simply because there is a spare corner.
If the compartment holds food, used cooking equipment or scented items, check the destination’s wildlife-storage rules. The National Park Service explains that food-storage requirements differ by park and include trash and other scented items. A locked exterior hatch is not automatically a compliant wildlife-storage system.
Rehearse both directions before the trip
In a safely parked RV, load the permitted equipment and close both baggage doors. Follow the equipment-retrieval portion of your arrival routine. Record what has to move before the first required item comes out. Then put every item back as though leaving a campsite.
Watch for four failures: a lid cannot open, a filled container is awkward to lift, a long item cannot turn, or the door closes only when gear is pushed against a seal or service component. Resolve the particular failure rather than adding another layer of storage around it.
Repeat with one retrieval side unavailable in the sketch. This is a planning exercise for campsite choice and alternate item locations, not permission to block required access. Critical equipment needs a realistic way out in the configurations you expect to use.
Your exterior-bay packing card
- RV, compartment and document checked: ________
- First equipment required by the setup procedure: ________
- Its retrieval side and position: ________
- What must move first: ________
- Container plus contents weight: ________
- Compartment, installation and vehicle limits checked: ________
- Travel retention and door closure checked: ________
- Wet or dirty items needing later attention: ________
- Next inspection or packing change: ________
Use the RV storage overview if the solution is moving an item into another approved zone. A pass-through does not need to contain every outdoor possession. It needs to support the tasks you actually perform, without losing the access and loading limits that make it usable.
Sources & further reading
Use these original sources for the full context and the latest guidance.
- MORryde: Cargo trays with 60 percent extension (opens in a new tab)
- MORryde: Cargo tray installation instructions (opens in a new tab)
- Winnebago Towables: Model Year 2025 owner's manual (opens in a new tab)
- NHTSA: Drive safe, secure your load (opens in a new tab)
- National Park Service: Bear safety and food storage (opens in a new tab)
Prepared with AI assistance. Read our editorial approach.
This is a researched planning guide, not a report of a hands-on product test.
Last updated .